Linda's Lunacy

Faith, Home, & Family

  • Home
  • ABC’s
  • Childhood Cancer Awareness Resources
  • Gardening
  • Giveaway Linky List
  • Gluten Free
  • Homeschool
  • In the Kitchen with Linda
  • Home
  • About Linda
  • Disclosure & Privacy Policy
  • PR Friendly
  • Get My Button

Review: Online Biblical Hebrew Course From Israel Institute of Biblical Studies

May 26, 2017 by Linda @ Linda's Lunacy


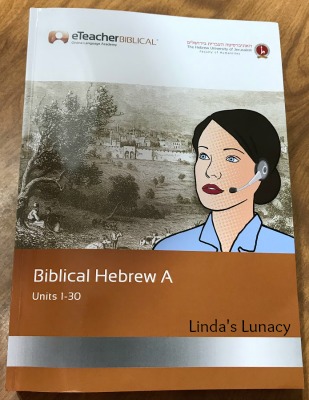
I recently had the opportunity to take a few Biblical Hebrew classes from Israel Institute of Biblical Studies. I have had an interest in learning Biblical Hebrew for a few years now. I had learned a few words in Hebrew on my own, but this was my first experience taking a class.


All the classes are online. There are 30 classes in this course, done over 9 months. There are many different times that the classes are held, all Monday – Friday. You get to chose which class you would like to attend. Class size is small, so we get plenty of chances to answer questions and ask questions. The teacher calls on each student to answer questions.

There is a white board that is used during class. The students are also able to write on the board during class using a pen tool on the screen that you direct with your computer mouse. We have used it to mark letters, to write letters, etc. I like that there is so much student participation. The instructors that I have had have been very encouraging when a student answers a question wrong. Encouraging them, putting the slide up where the student can see the answer to the question, and leading the student to find the answer.


Biblical Hebrew Online Class Review


I was asked to write this review after taking two classes. It has now been 6 weeks since our class started. One week class was cancelled for Israel Independence Day. I missed a class one day for family reasons. One week the teacher emailed ahead of time to let us know we would be having a sub for class that week. The sub was just as knowledgeable as our regular teacher. He picked up right where she left off, so I think when we have class next week we will be able to move on seamlessly.

A computer, and a microphone are mandatory for the classes. A webcam can be used, but I don’t have one right now. During class, you can see the teacher, and the students live on camera on one side of the screen. If a student doesn’t have a webcam, you can still see their name, and hear them. It has been so cool to be in class with people from around the world. The classes are conducted in English, so all attendees speak English. Unless we are speaking Hebrew. lol


I like that I had the option to receive text message reminders for class, as well as the email reminders that are sent automatically. I receive both.

Each class is recorded and a couple of days after the live class I receive an email with a link to the recording. This was great for the class that I had to miss. I can view it later and not get behind. It’s also great for reviewing what was covered in class while doing the homework. Yes, there is homework! The amount of time spent doing it has varied.


I like that passages of scriptures are used from the very 1st lesson. No, you can’t read it at first, but the instructor reads it aloud while you follow along. The instructor also had us find the letters we were learning in the passages.

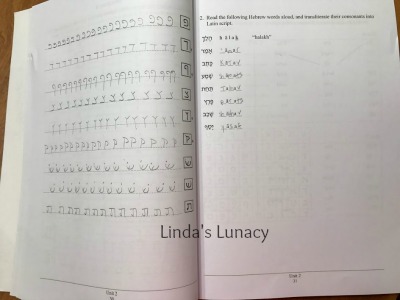
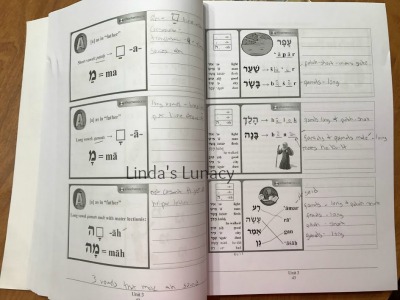
Here are a few pages that I have worked on in the book. The pictures in the book are exact replicas of the slides used in the online lessons.


Biblical Hebrew Online Class Review


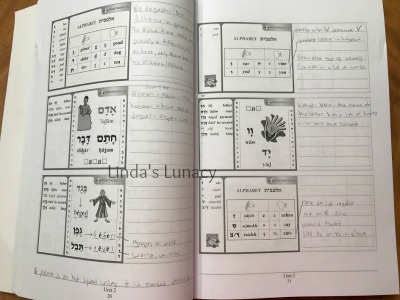
You learn how to read and write Biblical Hebrew, as well as how to write the transliterations of the Hebrew words. Ignore my handwriting. I have bad handwriting in English, so it goes that I will have bad handwriting in Hebrew. lol


Biblical Hebrew Online Class Review


I like that there is plenty of room on the pages to take notes. The book comes in physical form, as well as PDF. I loaded the PDF onto my phone. That way I can study even if I am not home.


Biblical Hebrew Online Class Review


I honestly have seen no cons to these online classes. Everything has gone smoothly, the instructors have been awesome, and the web interface has worked very well for each class. The teacher emails regularly, and we are encouraged to email her with any questions, or problems.


I have thoroughly enjoyed my time in these classes. I have learned a lot and look forward to taking more classes in the future.


For more information about these online Hebrew classes, visit Israel Institute of Biblical Studies.


Enter to win a free Biblical Hebrew Course! After you enter, you will receive an email for $100 off a class. Sounds good, right? Click on over to enter the Biblical Hebrew Course Giveaway!


*Disclosure (in accordance with the FTC’s 16 CFR, Part 255: “Guides Concerning the Use of Endorsements and Testimonials in Advertising”): I received one or more of the products or services mentioned above for free in the hope that I would mention it on my blog. Regardless, I only recommend products or services I use personally and believe will be good for my readers. I am disclosing this in accordance with the Federal Trade Commission’s 16 CFR, Part 255: “Guides Concerning the Use of Endorsements and Testimonials in Advertising.” My opinions are my own.

Filed Under: Homeschool Reviews, Reviews

The Important Lesson I Finally Learned about Being a Mother

May 3, 2017 by Linda @ Linda's Lunacy


Some moms have this whole mothering thing down, and don’t have trouble with this. Then some of us moms, like me, are still learning lessons. I slowly learned this lesson over the last few years. What am I talking about?


The Important Lesson I Finally Learned about Being a Mother


Ok, here it is. The important lesson I finally learned about being a mother.


It’s ok to make yourself and your health a priority.


The Important Lesson I Finally Learned about Being a Mother


Now, to you, that may not seem like an earth shattering observation. To me it is. I have always put my family first over myself. And I know there are many, many mothers out there just like me.


I in no way mean if you are taking care of yourself that you are not putting your family first.


Like I said above, some mothers have it all figured out. Then some of us are so busy taking care of the husband, the kids, the house, homeschooling, church ministry,etc. that we don’t pay any attention to ourselves.


Sound familiar? You try to serve healthy, nutritious meals to your family. Yet you are so busy at meal times and snack times making sure that the kids are eating what they should that you don’t pay attention to what you are eating. You make sure the kids have physical activities to participate in, yet you don’t make sure you have enough time to exercise.


There is a reason the flight attendants tell you that if the plane is crashing to out your own oxygen mask on first.


You can’t take care of anyone else if you don’t take care of yourself first!
It is important to make sure you get enough rest.
It is Important to make sure you are physically active.
It is important to make sure you eat the healthy meals you are serving, not just pick at something while you are cooking and cleaning up the kitchen.


So now after years of putting myself last, I am working hard at putting myself first. Making time for exercise, even if that means someone has to wait for something instead of me doing for them right away. My “baby” is 16, so the whole family is capable of waiting. If you have an infant, or toddlers, it’s different. You may have to exercise while they are sleeping instead. You will have to figure out what works for you.

It is of utmost importance for women to get enough rest, exercise, and to eat healthy. Our lives, and the lives of those we love depend on it.


We can’t take care of others if we don’t take care of ourselves first!


I wish I had learned and applied this lesson years ago!


Filed Under: Life with Linda

Such a Fun Camera! Polaroid Snap Touch Review & Giveaway

May 1, 2017 by Linda @ Linda's Lunacy


I recently received this Polaroid Snap Touch Instant Print Digital Camera to try out. It is such a fun camera! Let me tell you why.


Such a Fun Camera! Polaroid Snap Touch Review & Giveaway


But first, lets cover the basics. The Snap Touch camera comes with everything you see below. The camera itself, a magnetic lens cover, owners manual, wrist strap, usb cord, and 10 sheets of premium ZINK Paper.


Such a Fun Camera! Polaroid Snap Touch Review & Giveaway


The ZINK Paper makes peel, off, sticky backed photos. Without any ink! That’s right, there is no ink in the camera. The prints come out of the camera dry to the touch. They are smudge proof, water resistant, and tear resistant photos.  As soon as I received my camera, I purchased a package of the ZINK paper so I could take lots of pictures.

The camera comes in four fun colors, as well as black, and white. All have the rainbow stripe on the front.


Such a Fun Camera! Polaroid Snap Touch Review & Giveaway


The magnetic lens cover is easy to remove. It would be nice if it had some kind of strap on it to keep it from being lost, though.


Such a Fun Camera! Polaroid Snap Touch Review & Giveaway


The back of the camera opens easily to replace the photo paper.  You can see the openings on the bottom of the camera for a tripod, a micro sd card, and the usb charging cord. The cord also allows you to transfer pictures to your computer. The camera is blue tooth capable. There is an app to download on your phone so you can share pictures.


Polaroid Snap Touch Review & Giveaway


You access all the great features of this camera on the touch screen. You can take videos, create photobooth layouts, and add digital filters. You can customize your photos with stickers and borders. There is even a border to make your pictures look like the original Polaroid instant pictures. For added fun, there is a selfie mirror! You can see it in the pictures above. It is the small round circle next to the flash. Yes, it’s small. It is big enough, though, for you to see if you are in the picture.


Such a Fun Camera! Polaroid Snap Touch Review & Giveaway


Now how about some photos! All the photos in the pictures below were taken with the Polaroid Snap Touch camera.


Such a Fun Camera! Polaroid Snap Touch Review & Giveaway


As you can see, the pictures tend to curl a little. I don’t find it to be that big of deal, though. I printed about a dozen or so pictures, and only had one print with a white strip on the side.


Such a Fun Camera! Polaroid Snap Touch Review & Giveaway


I have found the colors to be consistent from picture to picture. I find it amazing how this thin piece of paper contains all ink to print pictures! It’s so cool!

Such a Fun Camera! Polaroid Snap Touch Review & Giveaway


I took these pictures at a family gathering. Everyone loved this camera! Even the adults were gathering around the camera to watch it print. lol It was the hit of our gathering.


The Polaroid Snap Touch is a fun, and highly functional camera. There are so many uses for it. Everyday pictures and videos, parties, family gatherings, etc. Group events, schools, homeschool co-ops, and much more. Kids will love having their pictures right away! The ability to turn the picture into a stick would be great for school projects, reports, etc. Or even a photo wall!


Such a Fun Camera! Polaroid Snap Touch Review & Giveaway


How would you like to win a Polaroid Snap Touch camera?!

Simply fill out the Rafflecopter form below. Be sure to read the terms and conditions on the form!


a Rafflecopter giveaway


*Disclosure (in accordance with the FTC’s 16 CFR, Part 255: “Guides Concerning the Use of Endorsements and Testimonials in Advertising”): I received one or more of the products or services mentioned above for free in the hope that I would mention it on my blog. Regardless, I only recommend products or services I use personally and believe will be good for my readers. I am disclosing this in accordance with the Federal Trade Commission’s 16 CFR, Part 255: “Guides Concerning the Use of Endorsements and Testimonials in Advertising.” My opinions are my own.


Filed Under: Giveaways, Reviews

Resurrection Rolls for Easter or Anytime!

April 15, 2017 by Linda @ Linda's Lunacy

*This Resurrection Rolls -for Easter or Anytime! post contains affiliate links

We have been making these rolls for years now. I don’t even remember how long, but it seems like they have always been part of our Easter celebration. We’ve been making these longer than some of my kids have been here! The kids have always loved making, and eating, these rolls!

Resurrection Rolls

1 roll Refrigerated Crescent Roll dough, in the tube
8 marshmallows
2 TBS melted butter
4 TBS sugar
1/2 tsp. cinnamon

We never measure. In fact, I, personally, have not assembled these awhile, as the kids take over and want to do it all themselves. Leftover butter and cinnamon sugar can be used on toast, so we don’t mind if there are leftovers.


Combine the cinnamon and sugar in a small bowl. To assemble, separate the crescent roll dough.


Dip a marshmallow into the melted butter, then into the cinnamon sugar.


Place onto the crescent roll. Seal the edges of the crescent roll securely.


If they are not sealed well, the marshmallow will leak out onto the cookie sheet while baking.

Bake according to package directions.


As you can see, some of ours opened while baking. That’s ok, they are still delicious!


So yummy!

You can tell the Easter story while assembling these rolls, that is, in fact, why they are called Resurrection Rolls. As your assembling the rolls, tell the kids that the marshmallow represents Jesus. The melted butter and the cinnamon sugar represent the oil and spices they anointed Jesus with. The crescent roll represents the tomb. After cooking, the empty roll represents the empty tomb.

My kids would actually eat these everyday, they are that good. Everyone that I have served these to, loves them. You will be glad you tried them, even if it’s not around Easter time when you make them.


Resurrection Rolls - a Yummy, Sweet Dinner Roll for Easter or Anytime!

Check out my Easter Egg Scavenger Hunt for Teens!

*Disclosure: This post contains affiliate links. If you click a link, and make a purchase, I may receive a small commission.

Filed Under: In The Kitchen With Linda Tagged With: Easter, recipe

1 Cool Hair Trick I Learned From My Daughter

April 10, 2017 by Linda @ Linda's Lunacy

I was eating dinner with my daughter the other night, and she just casually tells me a hair trick that I had never heard before.


1 Cool Hair Trick I Learned From My Daughter


1 Cool Hair Trick I Learned From My Daughter


She told me that she learned to put the conditioner on her hair before shampooing. Put on the conditioner, then shampoo as you usually do.


I tried it.


It worked brilliantly!


I have oily hair, but need conditioner on the ends. I’ve never been able to find a happy medium before. Even if I only put the conditioner on the ends, it always seemed to climb up my hair and make my even more oily. But now… The bottom of my hair is soft, but not weighted down like conditioners can do. Plus, no conditioner on top of my head to make my hair even more oily.


This trick is really going to work for me!

Filed Under: Life with Linda

Taco Pasta Salad Recipe

March 23, 2017 by Linda @ Linda's Lunacy

My whole family loves this Taco Pasta Salad. I’ve been making it for over 10 years now.  This recipe is from the July/August 2006 issue of Country Woman Magazine. Everyone that I have served it to, loves it. Hope you do too!


Taco Pasta Salad Recipe


Taco Pasta Salad Recipe

3 cups uncooked spiral pasta
1 pound ground beef
1 envelope taco seasoning
1  1/4 cups mayonnaise
2 to 3 tablespoons milk
3  3/4 teaspoons cider vinegar
3  3/4 teaspoons sugar
1 tablespoon ground mustard
7 cups torn iceberg lettuce
1 – 2 medium tomatoes, chopped
2 cups (8 ounces) shredded cheddar cheese
1/2 cups crushed nacho tortilla chips


1. Cook pasta according to package directions. Meanwhile, in a large skillet, cook beef over medium heat until no longer pink; drain. Stir in taco seasoning; heat through.

2. In a small bowl, combine the mayonnaise, milk, vinegar, sugar and mustard; set aside.

3. Drain pasta; place in a large bowl. Add beef and mayonnaise mixture; toss to coat. Add lettuce, tomatoes and cheese; toss to combine. Sprinkle with tortilla chips.

Serves 12-14


Taco Pasta Salad Recipe


Linda’s Notes:

  • You can use any bite size pasta. I have also used elbow, shells and other shaped pasta. They all work well.
  • I don’t like mustard, so I don’t use it.
  • I have used all kinds of lettuce, not just iceberg. I use raw spinach, too.
  • You can also use plain tortilla chips. Or none. I often serve this without chips.
  • We like to sprinkle the cheese on the top, instead of stirring in.
  • It’s delicious served warm like the recipe says. I also make this ahead of time and refrigerate. Served cold with or without chips it makes a great summer meal.


Filed Under: In The Kitchen With Linda

Bacon Cheddar Cheese Dip

March 17, 2017 by Linda @ Linda's Lunacy


I made this Bacon Cheddar Cheese Dip last week, and my family devoured it! Of course, my family loves anything with bacon. lol I went grocery shopping today and bought more supplies to make it for them again this weekend.


Bacon Cheddar Cheese Dip


Bacon Cheddar Cheese Dip


Ingredients:

1/2 pound bacon, chopped or crumbled
1/2 cup green onion, chopped
4 oz cream cheese, softened
1/2 cup sour cream
1 1/2 teaspoons Worcestershire sauce
2 cups shredded sharp cheddar cheese


Bacon Cheddar Cheese Dip


Combine all ingredients until well blended. Place into oven proof bowl (see notes below), smoothing the top.


Bacon Cheddar Cheese Dip


Bake at 350 for approximately 10 minutes. Time will vary according to the size of your bowl or pan. The bacon is already cooked, so you just need it to be hot and the cheese melty.


Serve warm with your favorite crackers.


Bacon Cheddar Cheese Dip


Linda’s Notes:


I divided this recipe into two of the bowls shown in the pictures, each with about 1 1/4 cups of dip before baking. You could use a larger bowl, or even a 9×5 pan, and adjust the cooking time.


I used turkey bacon, but you could certainly use pork bacon.


You can also serve this with chips, instead of crackers. A pita chip would be great with it.


It’s so good!


Bacon Cheddar Cheese Dip

Filed Under: In The Kitchen With Linda

« Previous Page
Next Page »
For God so loved the world that He gave His only begotten Son, that whoever believes in Him should not perish but have everlasting life.

For God did not send His Son into the world to condemn the world, but that the world through Him might be saved.

John 3:16-17 NKJV


< WOWBouquet’s Mother’s Day flower delivery – brighten Mom’s day with fresh blooms.

Get new posts by email:

<<Earth Day Deals Continue, Mother's Day Gifts Await — Save Up to 68% at Imarku!

Enter My Current Giveaway!


$10 Amazon Gift Card - ends 3/7 US

$75 Amazon Gift Card or Paypal Cash - ends 3/9 US CAN

$10 Amazon Gift Card - ends 3/14 US


Plexus Breast Chek Kit Take charge of your health! The Plexus Breast Chek Kit is designed for women to easily perform monthly self-examinations to help detect changes in their breasts.

Search


Archives

Categories

Momentum Influencer Network Member
Great American Pure Flix VIP Ambassador
WOWBouquet offers fast and reliable flower delivery for any celebration.

Designed By: Wacky Jacquis Designs