Linda's Lunacy

Faith, Home, & Family

  • Home
  • ABC’s
  • Childhood Cancer Awareness Resources
  • Gardening
  • Giveaway Linky List
  • Gluten Free
  • Homeschool
  • In the Kitchen with Linda
  • Home
  • About Linda
  • Disclosure & Privacy Policy
  • PR Friendly
  • Get My Button

Hamburger Pie Recipe

June 11, 2012 by Linda @ Linda's Lunacy

We weren’t able to have our Friday Night Fire cookout last week, so I was stumped about what to do with the hamburger. Nothing sounded good.

I remembered having something almost 30 years ago. I don’t remember what she called it, but I remember it being good. She made two large hamburger patties, cooked them and stacked them with onions, green peppers and tomatoes. That’s how I remember it, anyway

So I decided to re-create it from memory. I call it:


Hamburger Pie

You’ll need:

Hamburger
Onions
Green Peppers
Tomatoes

Amounts will depend on you. Use more or less of the vegetables to your taste. Use more or less hamburger, depending on how many people your serving.

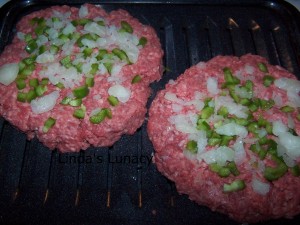
I used two pounds of hamburger divided into two patties. I topped them with diced green peppers and diced onion. You could also cook the patties without the onions and the green peppers, and add them raw later. I didn’t any any seasonings to the hamburger, but you certainly could.

hamburger onions green peppers

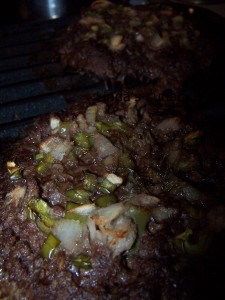
I baked these patties *350 for about 30 minutes. Time will depend on thickness of patties, and how well done you want them.

hamburger onion green pepper

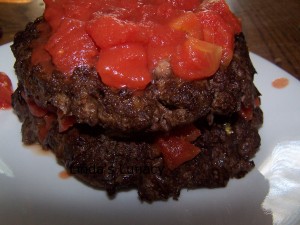
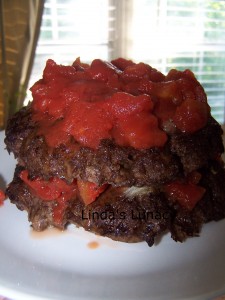
I then put diced tomatoes on one layer, topped with the second pattie and more tomatoes.

hamburger pie tomato

If your using raw onions and green peppers, layer them with the tomatoes.

hamburger pie tomato

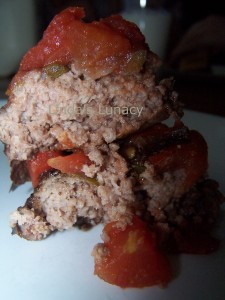
I sliced it up like a pie and served with baked potatoes and green beans.

slice of hamburger pie

My family loved it! They were disappointed that I didn’t make more.


Hamburger Pie Recipe
#ratingval# from #reviews# reviews
Print
Recipe Type: Main Dish
Author: Linda’s Lunacy http://lindaslunacy.com
Prep time: 20 mins
Cook time: 30 mins
Total time: 50 mins
Serves: varies
Ingredients
  • Hamburger
  • Onions, diced
  • Green Peppers, diced
  • Tomatoes, diced
  • Seasonings to taste
Instructions
  1. Amounts will depend on you. Use more or less of the vegetables to your taste. Use more or less hamburger, depending on how many people your serving.
  2. Shape hamburger into two patties, seasoning as desired. Top with onions and green peppers (or add them raw after cooking).
  3. Bake at *350 for 30 minutes or until desired doneness.
  4. Top one pattie with tomatoes, If using raw onions and green peppers layer them now. Then layer other pattie and more tomatoes (and onions ang green peppers).
  5. To serve, slice like a pie.
WordPress Recipe Plugin and Microformatting by EasyRecipe
2.2.6

For more tips and recipes, visit:

Linda's Lunacy


[Read more…]

Filed Under: In The Kitchen With Linda

Tattler Reusable Canning Lids Review & Giveaway

June 7, 2012 by Linda @ Linda's Lunacy

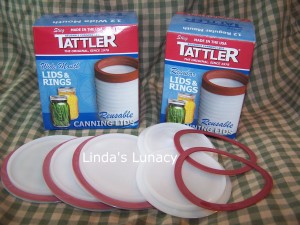
I love to can! It’s a lot of work, but it is so worth it. I love feeding my family food that I have preserved myself.  Last year, I shared  Canning Tips and Links, as well as pictures of my canning cabinets. Along the way, I’ve also shared lots of pictures of what I have canned. Earlier this year, I shared how I canned Red Bud Jelly.

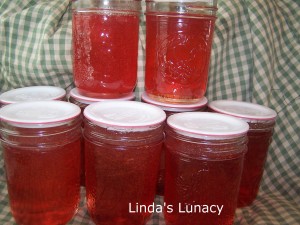
When I received these Tattler Reusable Canning Lids to review, I tried to locate some local strawberries to make jam. However, the weather earlier this year was harsh on the strawberries and I couldn’t find any. Luckily, I had some Red Bud juice in the freezer waiting to become more jelly.

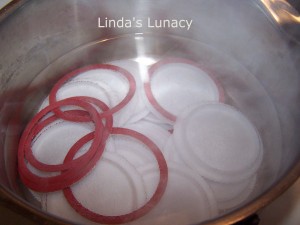
So I got busy in the kitchen using these lids for the first time. They were very easy to use, with only a couple of extra steps. You use these lids just like you do the disposable lids, starting with putting them in boiling water.


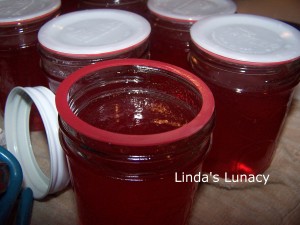
Once your jars are filled, and you’ve wiped the jars clean,  you place the rubber ring on the jar, followed by the lid.

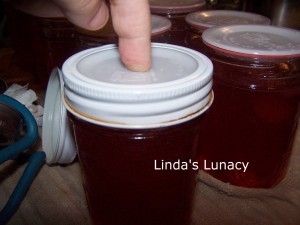
Then, while holding the lid in place with your finger, you screw on the lid, making sure it is only finger tight.

Process according to your recipe instructions. As soon as you remove the jar from the canner, tighten the lid all the way. Be careful you don’t burn yourself! I used a dish towel wrapped around my finger to hold the lid in place, while tightening the band with a pot holder covered hand. This was the only tricky part about using these lids, as the jars are hot! I didn’t get a picture of that step, as it would have required 4 hands and I only have 2. lol

Once the jars are completely cooled, remove the bands to check the seal. It was easy to tell the jar that didn’t seal, as the lid moved easily. The jars that did seal could be lifted just like with disposable lids.

Jars can be stored with or without the bands.

Opening the jars is easy. Simply insert a dull butter knife between the lid and the ring. Make sure not to use a sharp knife as the ring will be damaged.

I really loved using these Tattler Reusable Canning Lids. I look forward to building my supply and using them for many more years.

How would you like to win a set of Tattler Reusable Canning Lids? Tattler will be giving 2 boxes of lids, one regular and one wide mouth, to one winner. Simply fill out the form below to enter!
a Rafflecopter giveaway

Disclosure of Material Connection: I received one or more of the products or
services mentioned above for free in the hope that I would mention it
on my blog. Regardless, I only recommend products or services I use personally
and believe will be good for my readers. I am disclosing this in accordance
with the Federal Trade Commission’s 16 CFR, Part 255: “Guides Concerning the
Use of Endorsements and Testimonials in Advertising.

Filed Under: Giveaways, In The Kitchen With Linda, Reviews

What’s For Dinner?

June 4, 2012 by Linda @ Linda's Lunacy


Saturday – Sabbath- Make ahead meals- Dinner at family reunion

Sunday – soup & sandwich day – Homemade Chicken Nuggets, Homemade Baked Beans, salad

Monday – chicken – Chicken Parmesan, salad

Tuesday – pizza/pasta – Chicken Al Fredo, green beans

Wednesday – super simple – leftovers

Thursday – beef – Sloppy Joes, carrot sticks

Friday – Sabbath Dinner -Hamburgers over fire, potato salad,


For more ideas, visit Menu Plan Monday

Filed Under: In The Kitchen With Linda

What’s For Dinner?

May 28, 2012 by Linda @ Linda's Lunacy


We’re having a cook-out today for Memorial Day. I no longer stress over big cook-outs. See my Preparing for a Large Cook-out to relieve some of your stress and have a great cook-out.


Saturday – Sabbath- Make ahead meals- Breakfast for supper

Sunday – soup & sandwich day – Chicken Salad Sandwiches, carrots, and PB&J for those that want it.

Monday – chicken – Hamburgers, hot dogs, potato salad, baked beans, stuffed eggs, fruit salad, watermelon, chips

Tuesday – pizza/pasta – Chicken Parmesan, salad

Wednesday – super simple – leftovers

Thursday – beef – Spaghetti with meat sauce, green beans

Friday – Sabbath Dinner -Hamburgers over fire, potato salad


For more ideas, visit Menu Plan Monday

Filed Under: In The Kitchen With Linda

Gluten Free Oat Crackers

May 21, 2012 by Linda @ Linda's Lunacy

Since I’ve stopped eating wheat, I’ve had such a hard time finding crackers to eat. Gluten Free crackers are really expensive. And the taste leaves a lot to be desired. Most are also lacking in nutrition. So I’ve been researching how to make my own crackers.

I’ve been making GF Oat Crackers lately. To insure they are gluten free, use gluten free oatmeal to make your oat flour. Or purchase GF oat flour. I find it just as easy to make my own. It’s so simple. Place oatmeal in blender. Blend until the flour is the consistency you want. It just takes a few minutes. I then put my oat flour in a canning jar for the next time I’m baking.

These are yummy little crackers. I eat mine plain, with dips, and I’ve even eaten them with tuna fish.


(Pretend there is a picture here. lol I forgot to take pictures the last time I made them. I wanted to share now instead of waiting to make them again. I’ll post a pic later. )


Gluten Free Oat Crackers

1/2 cup gluten free all purpose flour

1/2 cup oat flour

1/2 teaspoon salt

2 tablespoons butter

6 tablespoons water


Mix dry ingredients together. Cut in butter using a pastry blender or two knives. Add water. You want your dough to be similar in consistency to pie crust. So use more or less water as needed.

Roll dough out on GF floured surface to approximately 1/8 of an inch, or desired thickness. Transfer rolled dough to greased cookie sheet. If desired, brush top of crackers with butter and sprinkle with a little salt. Score the crackers with a pizza cutter to desired size.

Bake at 400* for 15 minutes. Cool, then break crackers on score lines. I store mine in a canning jar. Any air tight container would work.

*Tip – When your ready to transfer your dough, roll it around the rolling pin, then unroll onto the pan.


For more tips and recipes, visit:
Linda's Lunacy


[Read more…]

Filed Under: In The Kitchen With Linda

What’s For Dinner?

May 21, 2012 by Linda @ Linda's Lunacy


Saturday – Sabbath- Make ahead meals- Chicken Salad Sandwiches

Sunday – soup & sandwich day – Egg Salad Sandwiches, Chicken Salad Sandwiches, celery, and PB&J for those that want it.

Monday – chicken – Baked chicken, baked potatoes, salad

Tuesday – pizza/pasta – Homemade Pizza, salad

Wednesday – super simple – Chicken and rice in the crockpot, zucchini

Thursday – beef – Spaghetti with meat sauce, green beans

Friday – Sabbath Dinner -Hamburgers over fire, potato salad


For more ideas, visit Menu Plan Monday

Filed Under: In The Kitchen With Linda

Freezing in Jars

May 16, 2012 by Linda @ Linda's Lunacy

Did you know you can use jars in the freezer? Jars are great for freezing. As long as you leave plenty of head space. Frozen food expands, and if not given enough head space, the expansion will pop the lid off or break the jar. Which leaves a mess in the freezer!

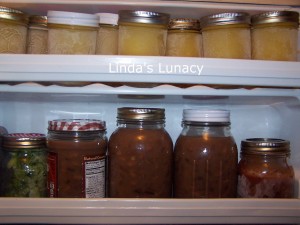
This is my freezer door. The small jars on the top shelf are orange juice slushies. The bottom shelf has green peppers, cooked pinto beans with broth and pizza sauce all in jars.

freezing in jars

The kids love juice slushies during the summer. And they’re great for sore throats any time of the year. Having cooked beans in the freezer is such a time saver!

You can use canning jars, or glass jars you save from peanut butter or condiments. Since you can use the glass jars instead of throwing them away, you will save money buying freezer bags or plastic containers.

Freezing in jars works for me!


Visit Works For Me at We are That Family for more great ideas.

You can also purchase the That Works For Me! PDF E-book with hundreds and hundreds of ideas. Since it’s in PDF format, no e-reader necessary!

*This post contains an affiliate link. If you click on the link and make a purchase, I will receive a small commission.

Filed Under: In The Kitchen With Linda, Works For Me Wednesday

« Previous Page
Next Page »
For God so loved the world that He gave His only begotten Son, that whoever believes in Him should not perish but have everlasting life.

For God did not send His Son into the world to condemn the world, but that the world through Him might be saved.

John 3:16-17 NKJV


< WOWBouquet’s Mother’s Day flower delivery – brighten Mom’s day with fresh blooms.

Get new posts by email:

<<Earth Day Deals Continue, Mother's Day Gifts Await — Save Up to 68% at Imarku!

Enter My Current Giveaway!


$10 Amazon Gift Card - ends 3/7 US

$75 Amazon Gift Card or Paypal Cash - ends 3/9 US CAN

$10 Amazon Gift Card - ends 3/14 US


Plexus Breast Chek Kit Take charge of your health! The Plexus Breast Chek Kit is designed for women to easily perform monthly self-examinations to help detect changes in their breasts.

Search


Archives

Categories

Momentum Influencer Network Member
Great American Pure Flix VIP Ambassador
WOWBouquet offers fast and reliable flower delivery for any celebration.

Designed By: Wacky Jacquis Designs